
Locations
Overview
The Locations section is where you can create and keep track of your locations, using visuals and prompts to bring them to life.
You can view all of your locations as a group, and you can open up individual locations to view and edit them in great detail.
The Locations prompts go into the sort of level you would need for world building, so this section can be particularly useful for fantasy writers creating their own unique worlds.
Go to the Locations section by clicking the option in the left-hand menu with a little castle icon.

Location Cards Overview
When you first go to the Locations section, the main area shows an overview of all your locations.

Each location is represented by a card, which comprises an image and a brief description.

To change the location image, you simply hover over it, and then click. Then you can choose an image from your computer.

To make further edits to the location’s details, you can hover over the card to make the context menu button appear. Click that, then click ‘Open’. Or alternatively you can double click the location card to open it.

To delete a location, hover over the card until the context menu button appears, then click ‘delete’.
Location List
On the left-hand side of the Locations section is a Location List.

This list can be hidden and expanded by clicking the little arrow tab towards the bottom.
The Location List shows a list of all the locations that have been created in your novel.
If you click on one of the names in the list, it will open up the details for that location.

Location Details
Each location can be developed in great detail.
Open up a location by double clicking the card, choosing ‘Open’ from the context menu or clicking the name in the Location List.
Once you’re in the location details, the Location List can be used to quickly jump between locations without having to go back to the Location Cards Overview. However, if you do wish to go back to the overview page, you can do this by clicking the little ‘grid’ icon found towards the top of the Location List.

In the location details you can find panels for the following:
- Basic Info
- Gallery
- Description
- People
- Senses
- Landscape and Continents
- Climate and Weather
- Flora and Fauna
- Population
- Governance and Economics
- Education and Employment
- Agriculture, Industry and Trade
- Conflict
- Family and Friendships
- Social Rules
- Food
- Art and Architecture
- Religion
- Languages
- Clothing and Fashion
- Entertainment, Celebrations and Festivals
- Forms of Magic
- Magic Users
Editing Location Details Panels
The panels have been designed in a way to try to give you a huge variety of prompts and guidance, whilst keeping the interface as uncluttered as possible.
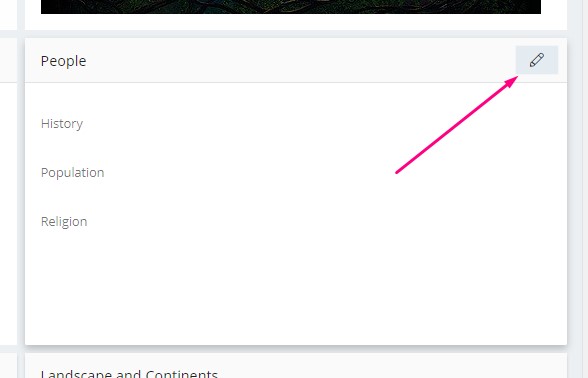
Most of the panels will initially show you a title, and display a list of the questions which can be found within that panel.
To edit the details of the panel, hover over it and an edit button will appear. Click that button to go into edit mode.
Once you’re in edit mode, the same questions will appear that you saw in view mode, but with spaces to enter your data for that Location.
The fields can be expanded by dragging down the bottom right hand corner of any given field.
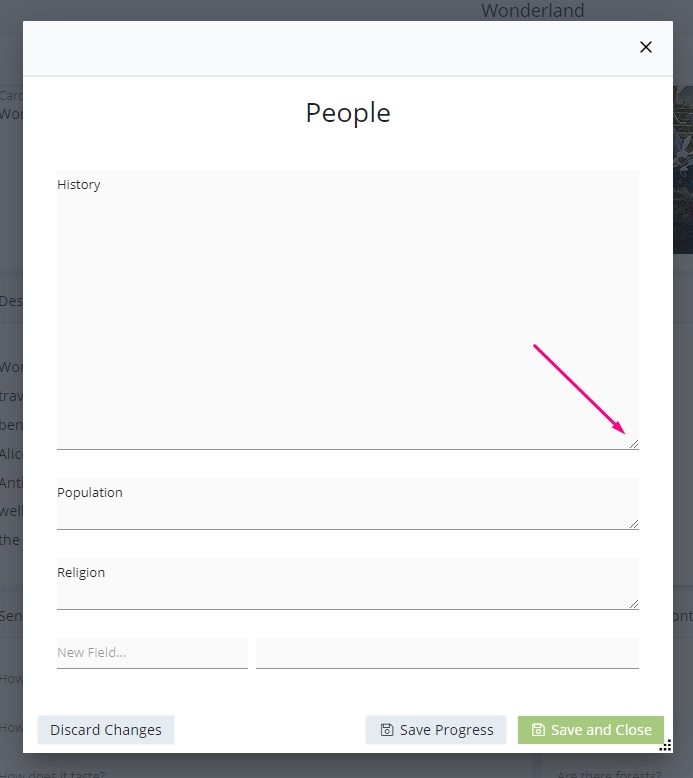
At any point while editing a panel, you can use the buttons at the bottom to discard your changes, save your progress without closing the popup, or save your data and close the popup.
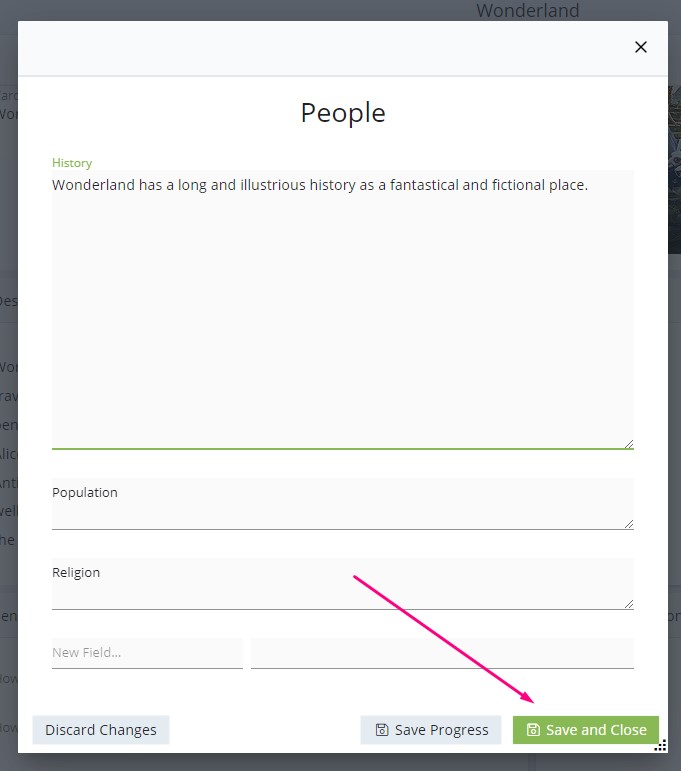
You can enter data for all of the questions, or just a few, as suits you. Once you’re done, click ‘Save and Close’.
When you have entered and saved the data, what the panel displays changes slightly.
Now, instead of showing a list of all of the questions, it only shows the ones you’ve entered data for.
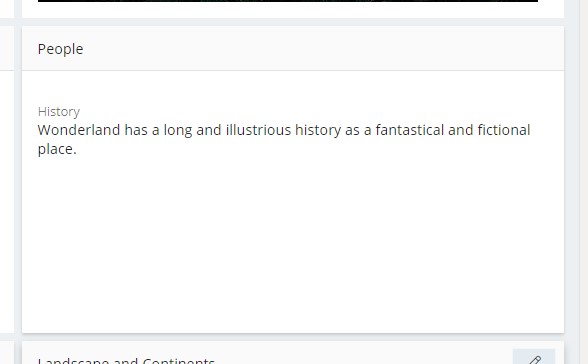
This helps keep the display as streamlined and uncluttered as possible.
However, the questions that you didn’t enter data for are not lost. At any time, you can return to edit mode and all of the questions for that panel will be available.
Editing the Gallery
The gallery works a little differently to the standard panels. If you have added an image to the location card from the location cards overview, this will automatically be added to the gallery.
To add another image to the gallery, hover over the gallery panel, then click the ‘+’ button which appears.
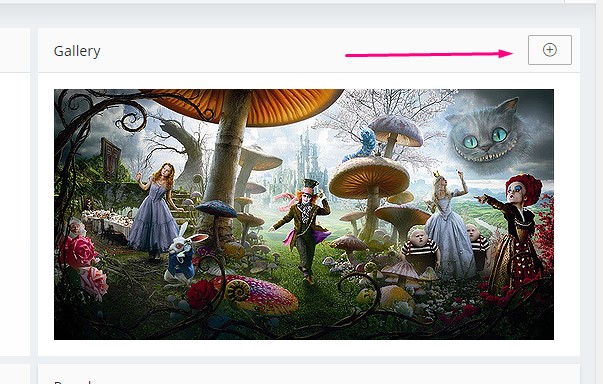
Browse for the image you want on your computer and click ‘open’ to add it to the gallery.
You can change the main image for a location – the one which appears on the location card. To do this, hover over the image you’d like to set as the main image. Click the context menu button (three vertical dots) which appears and click ‘Set as main image’.
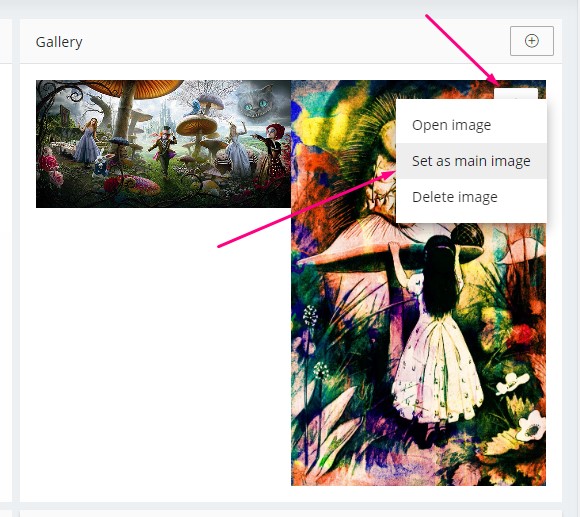
You can delete an image by selecting ‘delete image’ from the same menu.
Customising the Panel Display
There are a lot of panels – we know! And we understand how important an uncluttered interface is to creative flow.
Because of this, you can hide or show the various panels as suits you.
To do this, look for the little down arrow button which can be found at the top right of the main area.

Click on that arrow and a list will appear which shows all of the available panels, next to a green tick checkbox.

To hide a panel, uncheck the box.

Note: Basic Details and Gallery are non-standard panels and cannot be hidden.
Related Info
The Related Info side panel can be opened by clicking on the little tab towards the bottom right of the screen. It can be hidden by clicking on the same tab.

This panel shows all associated information for the selected location.
You can link the location to scenes, characters, items, notes and other locations. For more information on using the Related Info panel and linking items, click here.