
Plot Manager
The Plot Manager works a bit like a corkboard or whiteboard; it’s a space where you can add index cards or sticky notes describing key parts of your plot, and then shuffle them around.
This can be useful for planning a novel before writing it, or for easily rearranging scenes of an existing draft.
In this article we’ll look at:
- Index Cards
- Plot Templates
- Chapters
- Related Info
- How the Plot Manager interacts with other sections
Index Cards
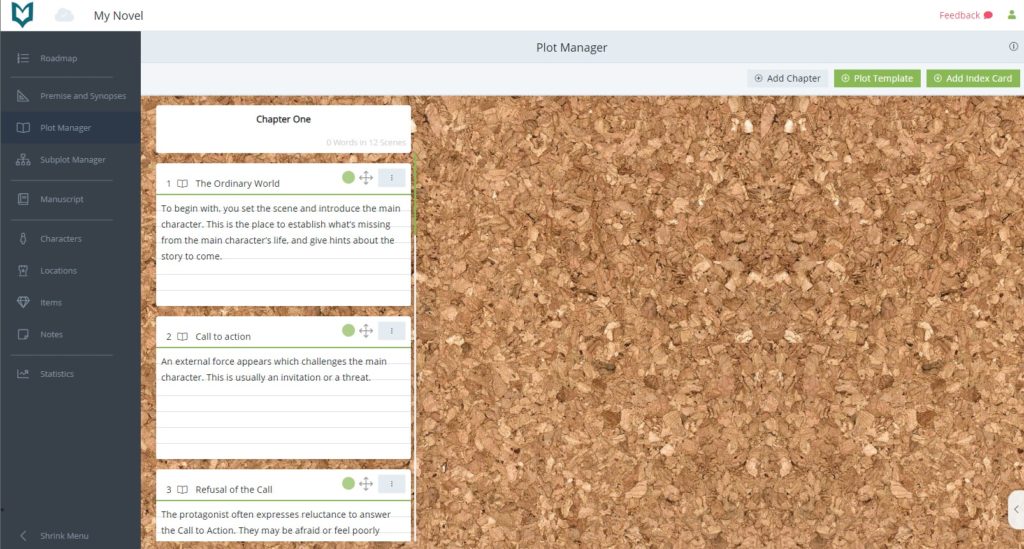
The core of the plot manager is the index cards.
Adding an index card
You can add an index card to the board by clicking the green button that says ‘Add Index Card’.
![]()
Editing an index card
To edit an index card, hover over the card, click on the context menu (the three dots in a vertical line), and click ‘Edit’.
![]()
You will now be able to edit the card’s title and description. When you’re finished, click the ‘save’ button.
Note: Depending on your browser, you may also be able to edit a card by double clicking it.
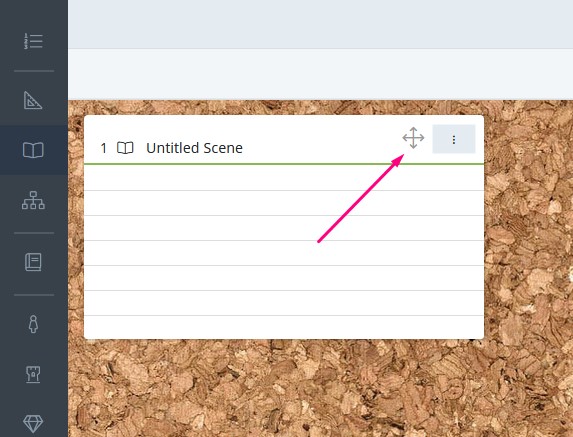
Rearranging index cards
You can move index cards around by clicking the ‘grabber’ icon (or anywhere else in the header section) and dragging and dropping them.
Deleting an index card
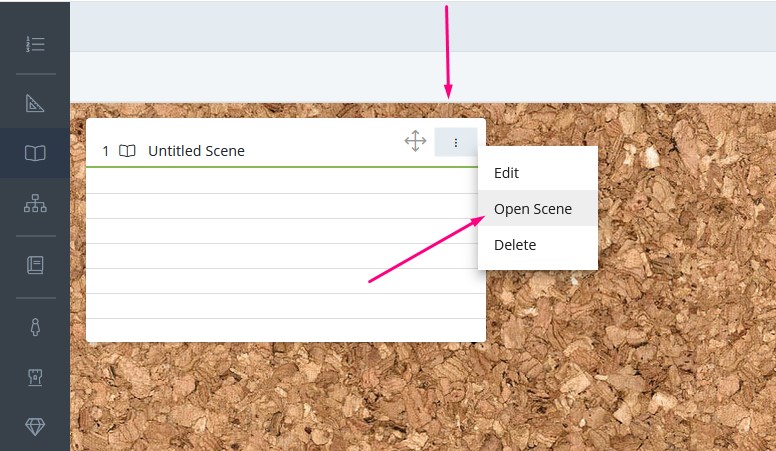
To delete an index card, click the context menu button in the top right corner of the card, then click ‘Delete’.
Navigating to an index card’s corresponding scene
Every time you create an index card, it creates a corresponding scene in the manuscript section. You can jump straight to that scene by clicking the context menu and then clicking ‘Open Scene’.
Plot Templates
Rather than having to create your index cards from scratch, The Novel Factory offers a range of plot templates based on popular genres.
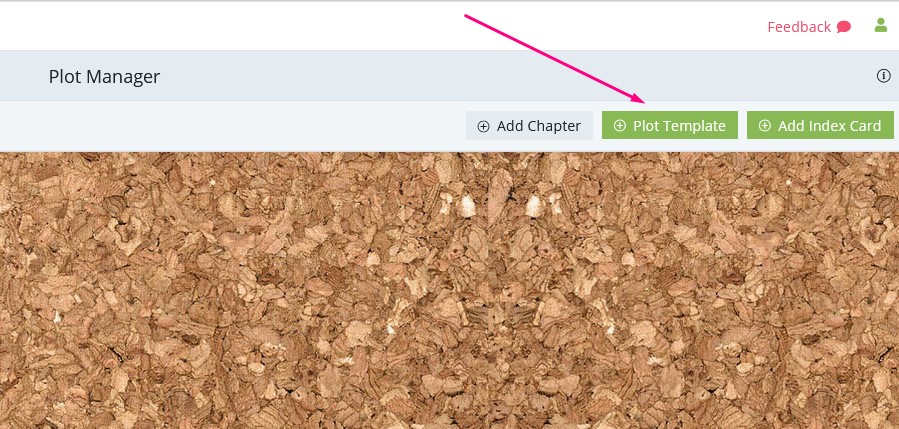
Selecting a Plot Template
In the Plot Manager section, click the green ‘add Plot Template’ button.
This will call up a pop-up, which will give you a variety of popular genre plot templates to choose from.
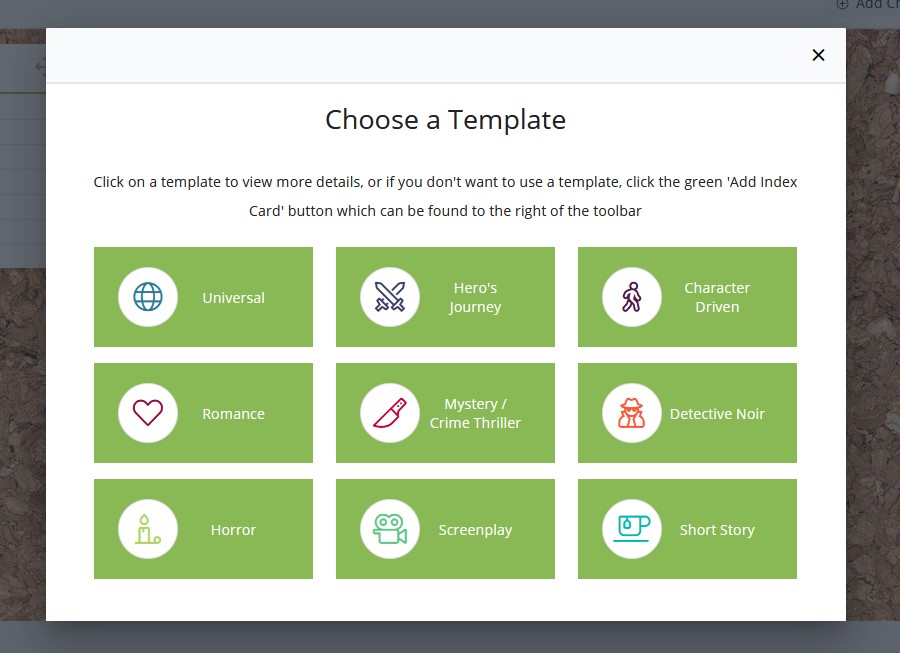
If you click on one of the options, it will give you more information about that template, and the beats (structural elements or plot points) that are included in it.
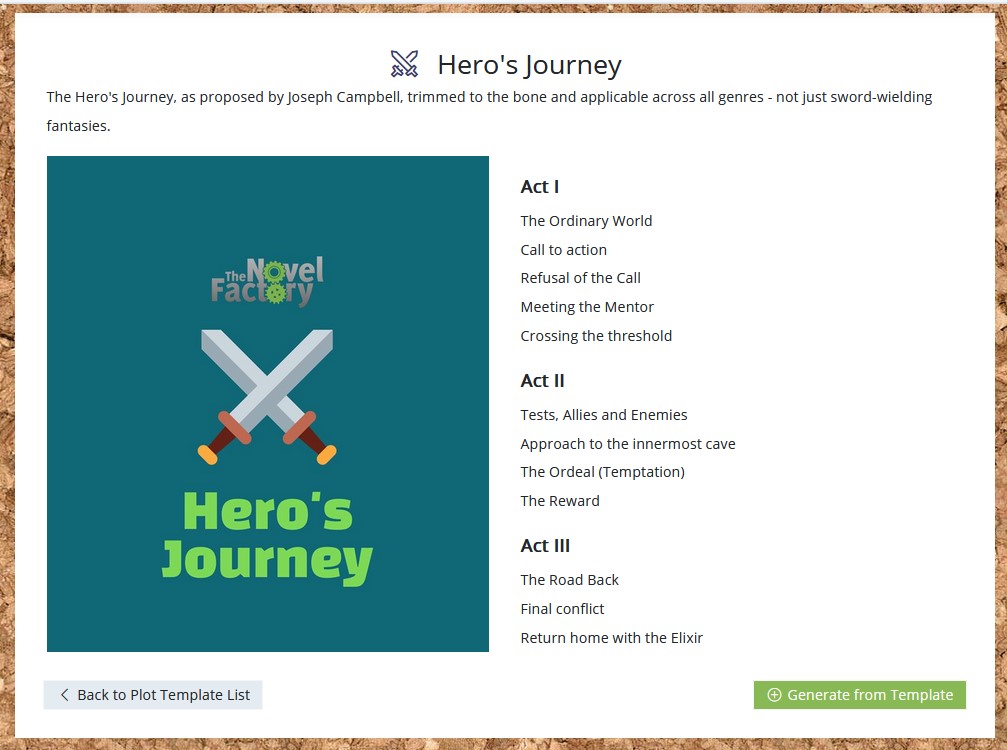
Browse the plot templates until you find the one best suited to your novel, then click ‘Generate from Template’.
The software will generate a series of index cards for you –one for each beat of the plot template. In many templates, the cards will also include extra details about what you might expect to find in that beat of the plot.
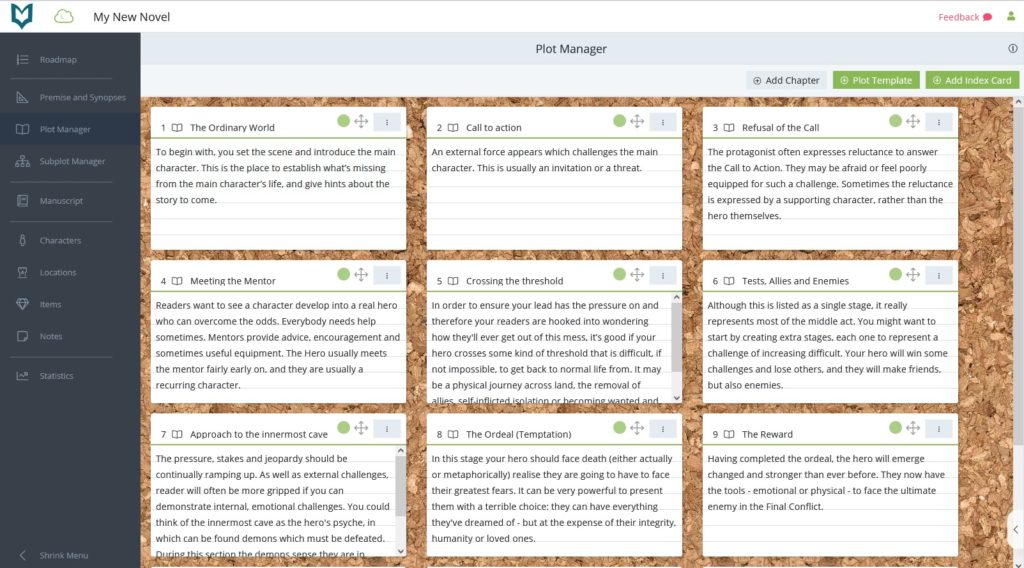
You can then play around with the template, adding extra index cards, changing the text on them and shuffling them around by following the instructions described above.
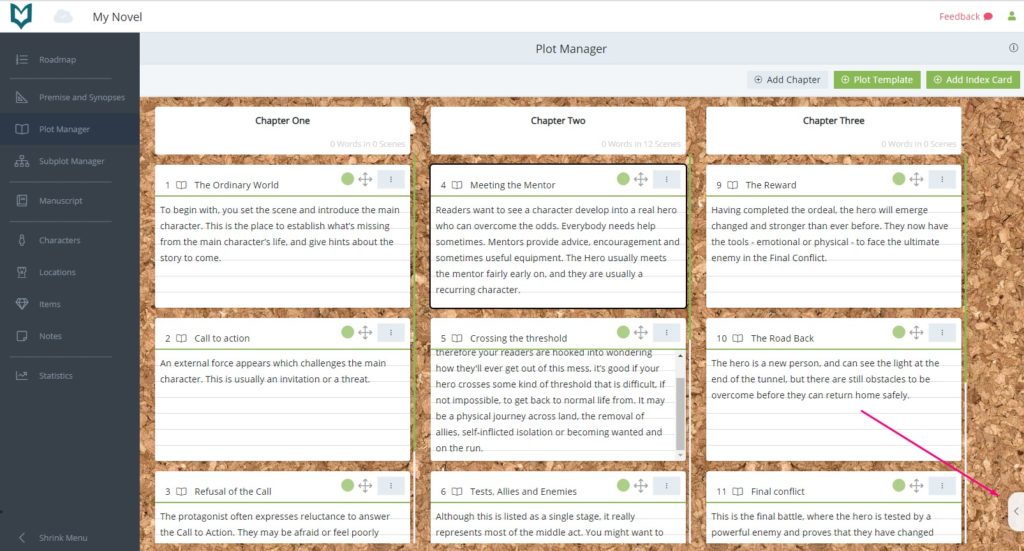
Chapters
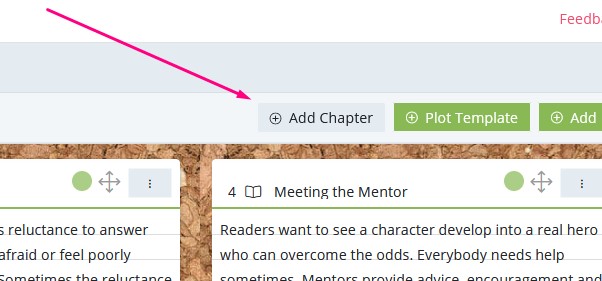
You can organise your index cards into chapters. To add a chapter, use the grey ‘Add Chapter’ button in the toolbar towards the top right.
This calls up a pop-up where you can name the chapter.
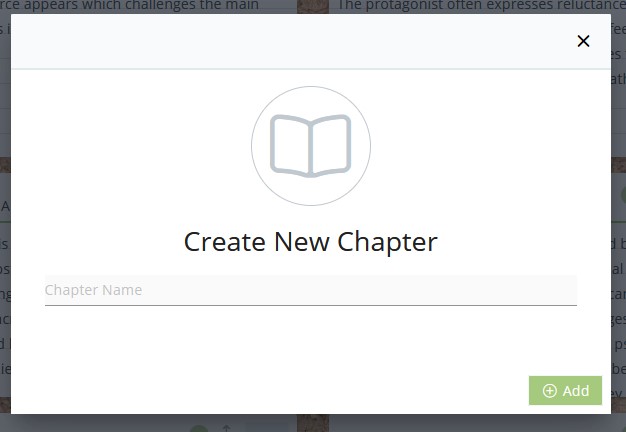
(If it’s not the first chapter, you can also choose whether you would like to add it at the beginning or the end of the novel.)
Click add and the Chapter will be created, and all existing Index Cards will be contained within in.
For more information on how chapters work, including how to edit, move and delete them, click here.
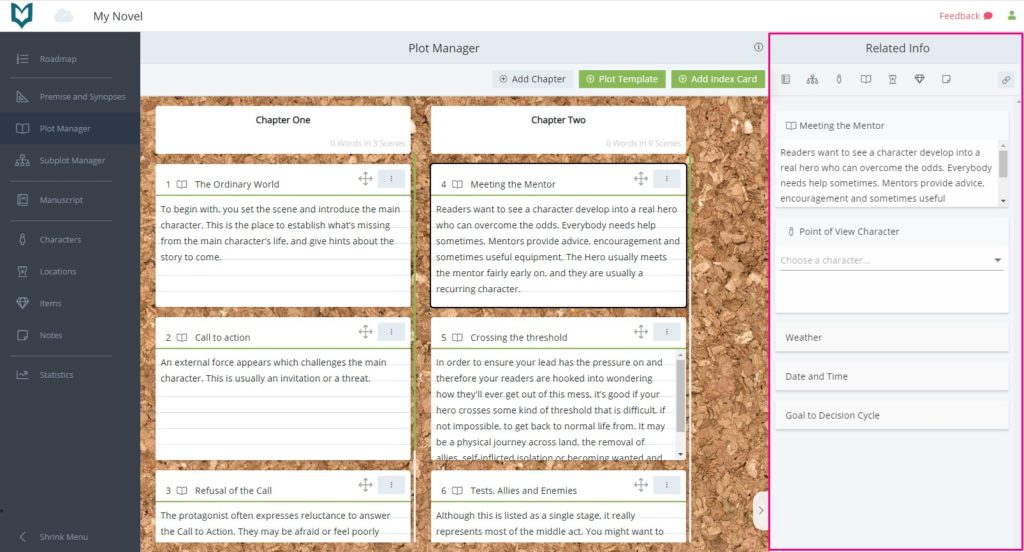
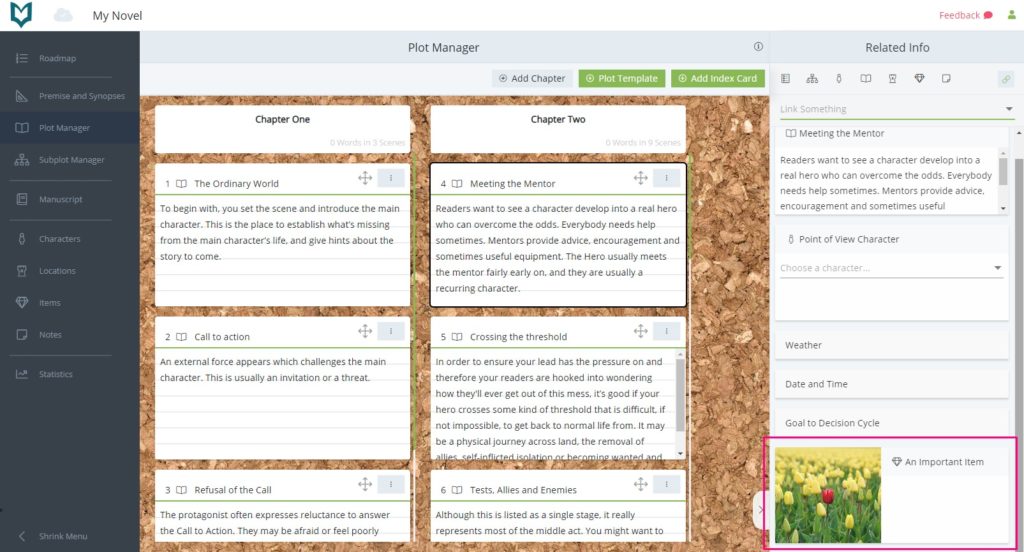
Related Info
The Related Info side panel can be opened by clicking on the little tab towards the bottom right of the screen. It can be hidden again by clicking the same tab.
This panel shows all associated information for the selected index card. (You can select an index card by clicking on it and you can tell which scene is selected because it will have a thick black border around it.)
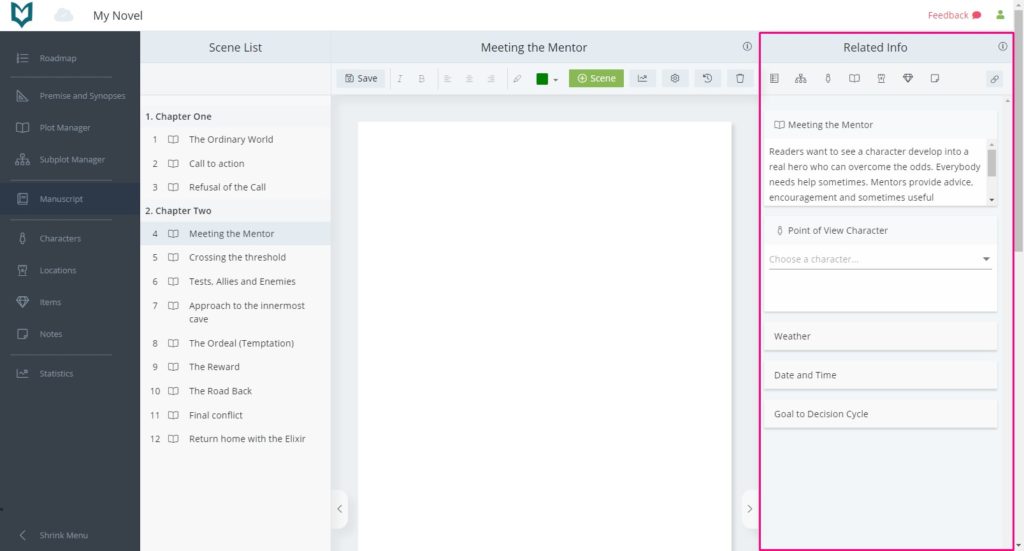
Note: as every index card is linked to a scene, they share the same related info. So whatever you add to an index card will also be visible when you go to view the associated scene in the Manuscript area.
A number of fields are included in the Related Info of an index card by default, including POV Character, Weather, Date and Time, and Goal to Decision Cycle.
You can also link characters, locations, items and other scenes to an Index Card – see below.
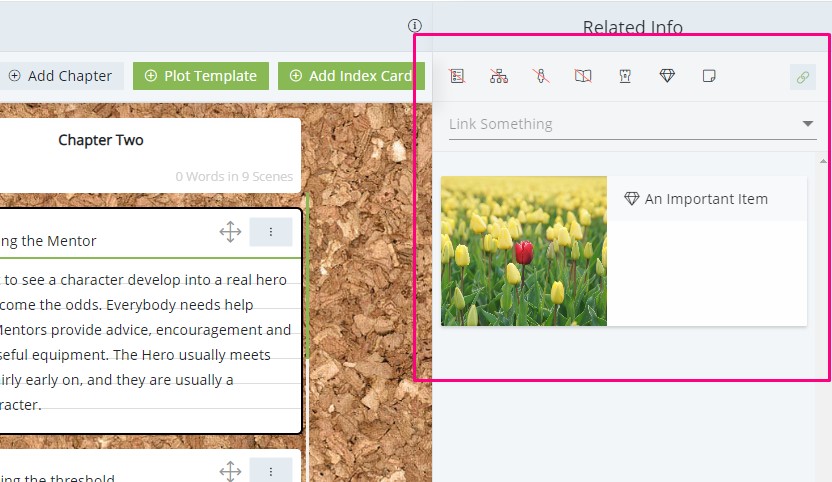
Linking Related Info (characters, locations, items, scenes and notes)
To link something, click the chain link icon towards the top right of the Related Info panel.
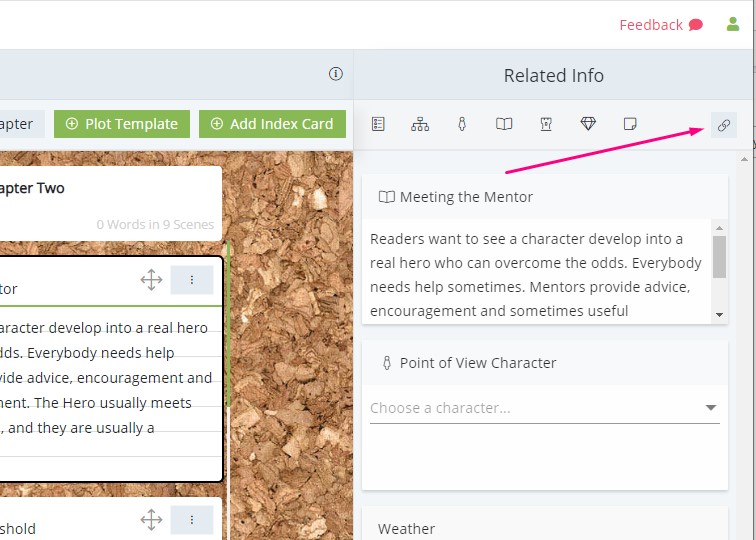
This will expand the ‘link something’ field. (This ‘link something’ field may already be visible if you have opened it before).
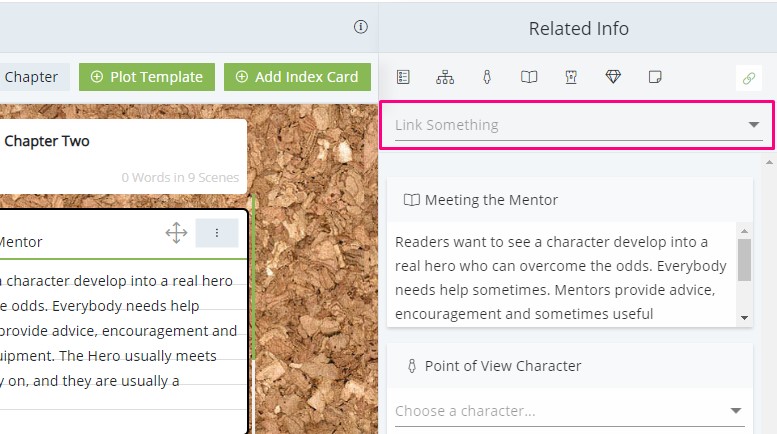
Click where it says ‘Link Something’, and a list of all the things available to be linked will appear.
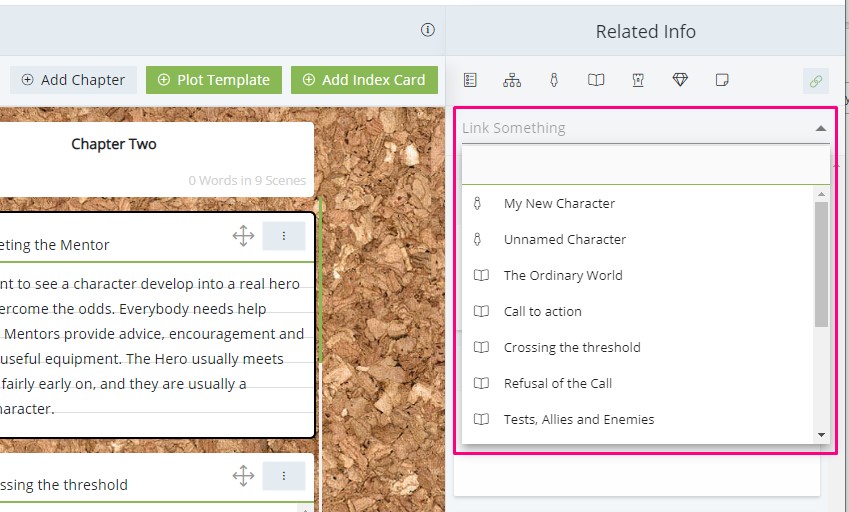
If you start typing, it will filter the available options by what you type. Note that you can link characters, locations, items, notes and other scenes.
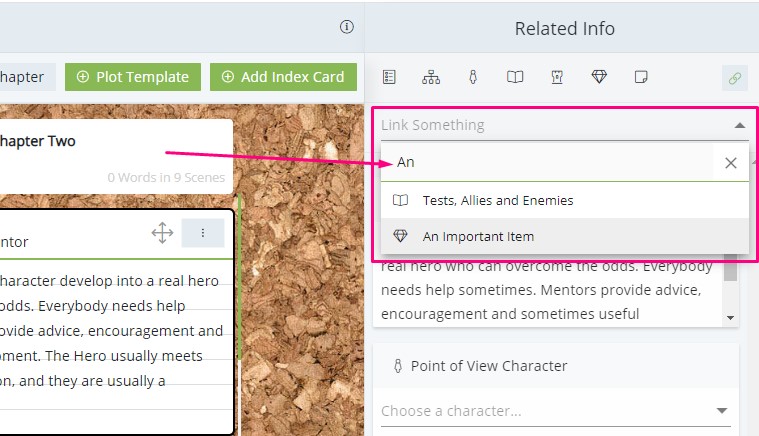
Select the desired item and click on it to link it to the Index Card (Scene) and have it display in the Related Info.
Linking Subplots
Subplots work a little differently to the other things you can link.
In the Subplot Manager, if a plot event is aligned with a scene, then it will automatically show in the Related Info for the scene (Index Card).
If you want to move a plot event to a different scene, this needs to be done from within the Subplot Manager.
Please see the Subplot Manager article for more information on how this works.
Filtering the Related Info
You can use the icons in the toolbar to filter the information in the Related Info sidebar.
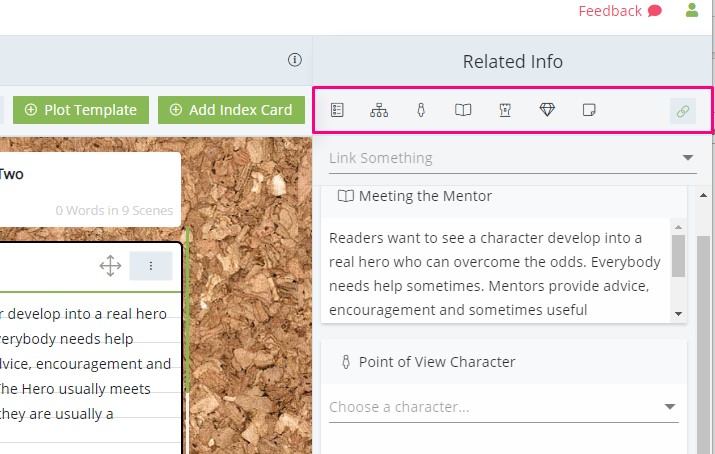
When all the icons are set to visible, all related info will be shown. However, you can choose to temporarily hide specific sections of the related info as follows:
- Scene Details
- Subplots
- Characters
- Scenes
- Locations
- Items
- Notes
When you click on one of those icons, a strikethrough will appear over it. This indicates that the related info from that section (i.e. characters) is now hidden.
How the Plot Manager interacts with other sections
The Plot Manager and the Manuscript
As mentioned above, each Index Card is linked to a Scene in the Manuscript, and these are intrinsically connected. So if you delete an Index Card, it will delete the associated Scene in the Manuscript Section.
Likewise, if you delete a scene in the Manuscript section, the corresponding Index Card will also be deleted.
The Plot Manager and the Subplot Manager
All the Index Cards in the Plot Manager appear in a single column to the left hand side of the Subplot Manager.
This allows you to create a cross-referenced grid of subplots, and associate them with the relevant scene.
See the Subplot Manager article for more information on how to create and use subplots.
The Plot Manager and Character Viewpoint Synopses
In the Characters section, each character can have a Character Viewpoint Synopsis. This means that you can tell the whole story from the point of view of that character.
This is done by writing their point of view during each scene. So in the Character Viewpoint Synopsis section, you will be able to view a vertical column of the Index Cards for reference as you write your synopsis for that character.
So if you delete an Index Card, the information written in any of the Character Viewpoint Synopses for that scene will also be deleted.