
Subplot Manager
The Subplot Manager is designed to help you keep track of multiple subplots, by creating a flexible cross-referenced grid.
You can find it by clicking the fourth option down in the main navigation.
This is what the Subplot Manager looks like:
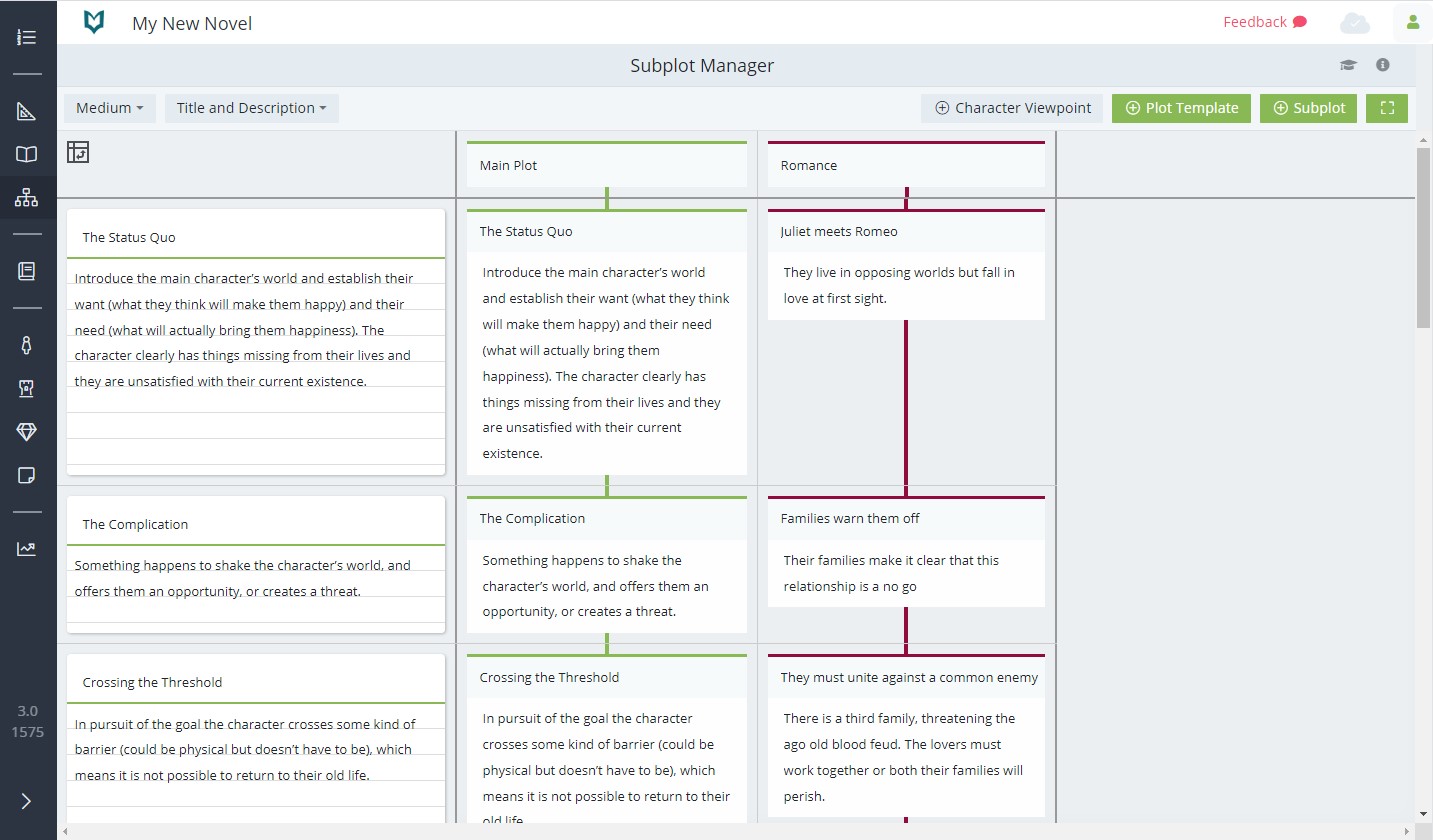
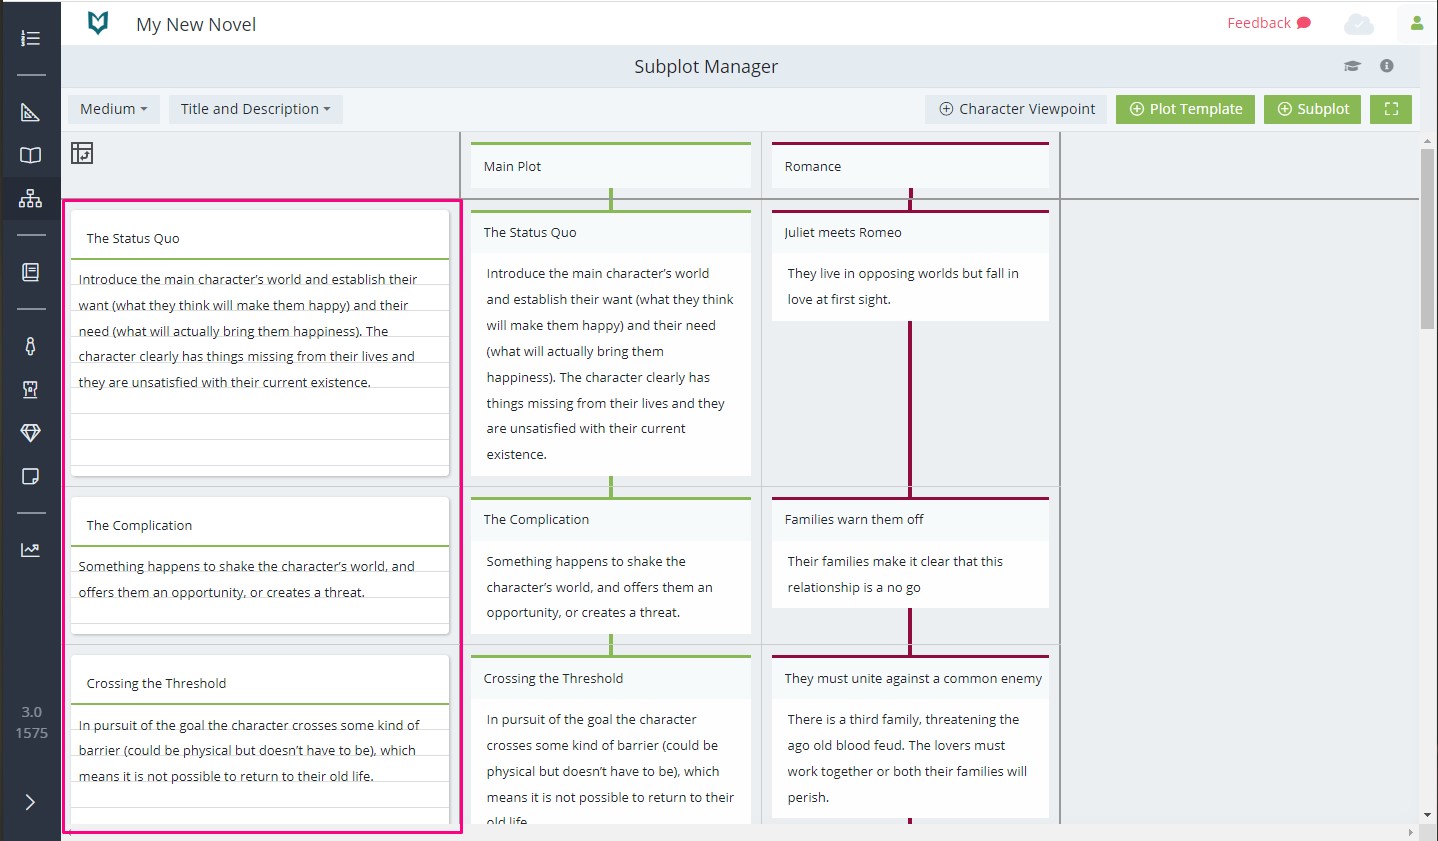
Along the left in a single column are your index cards. These mirror what you can see in your Plot Manager.
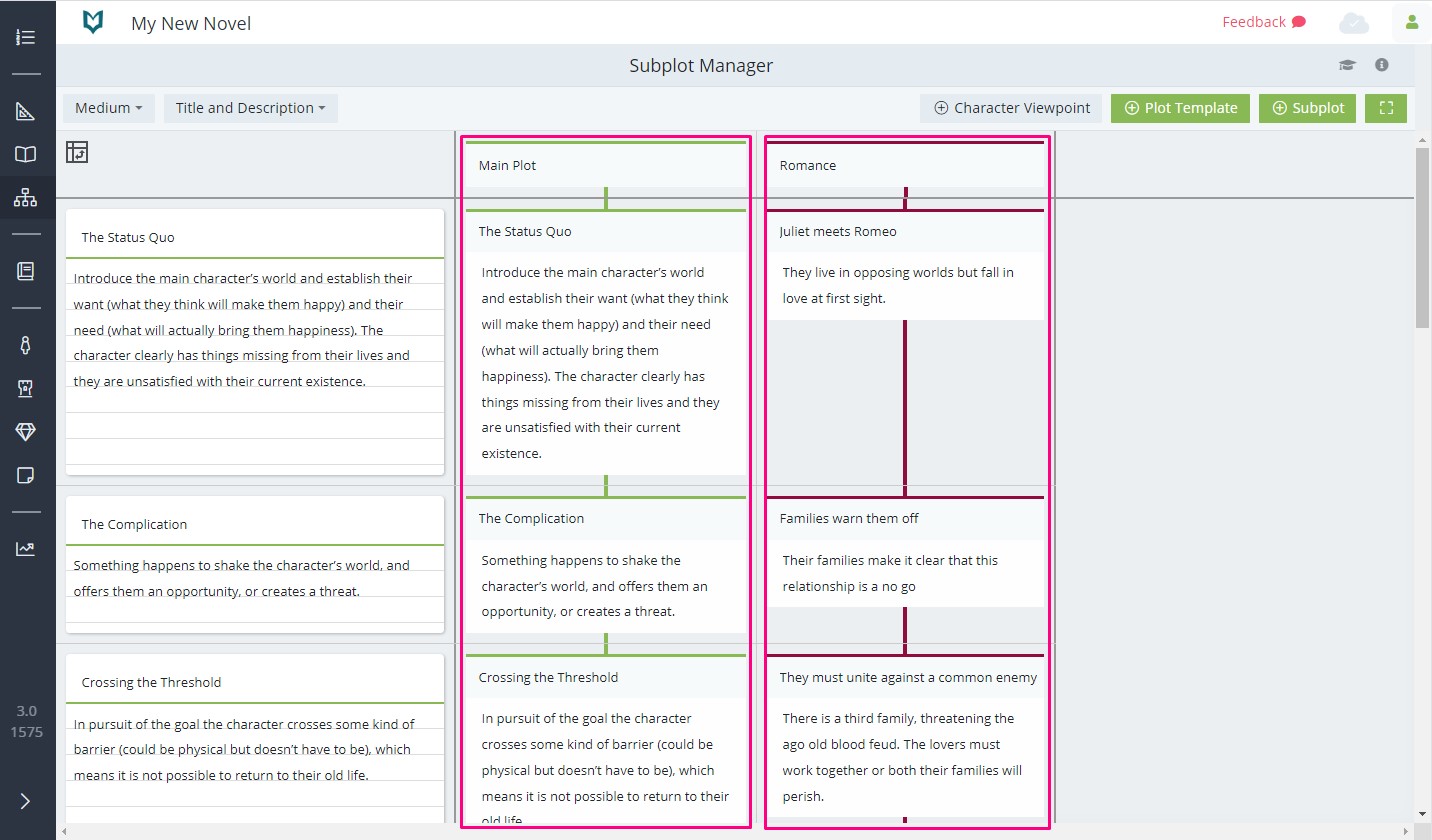
Next to the index cards are the subplot columns.
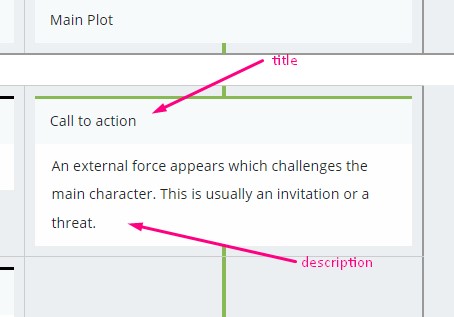
The cards within the subplot columns are called subplot/plot events. So this is what a subplot/plot event looks like:
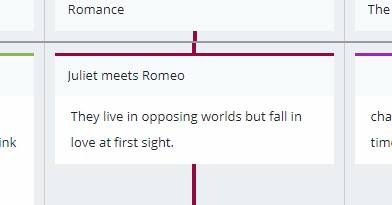
Each subplot event card consists of a title and a description:
Note: when you use one of The Novel Factory’s plot templates to form the core plot of your novel, the plot is added in the Subplot Manager both in the main index cards AND as a subplot column:
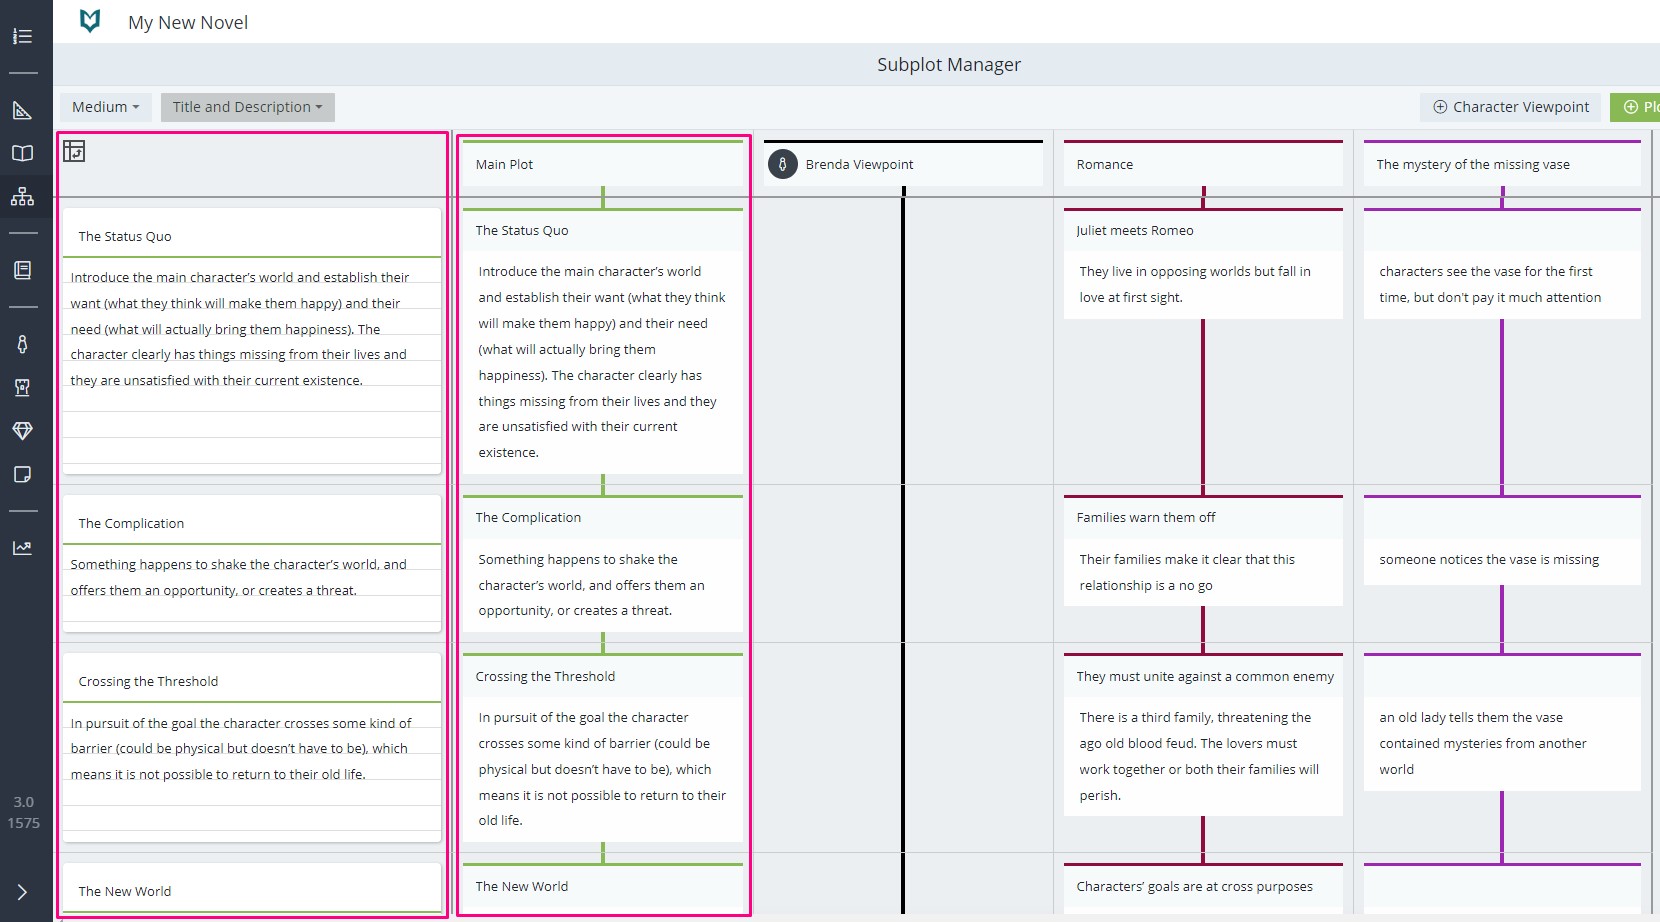
At first this looks like unnecessary duplication; however, having this means that as your story evolves and you replace the default text on the index cards, add more cards and shuffle things around, you still maintain a reference of the original plot beats. If you don’t feel you need them, you can always delete the column.
Along the top is the toolbar:
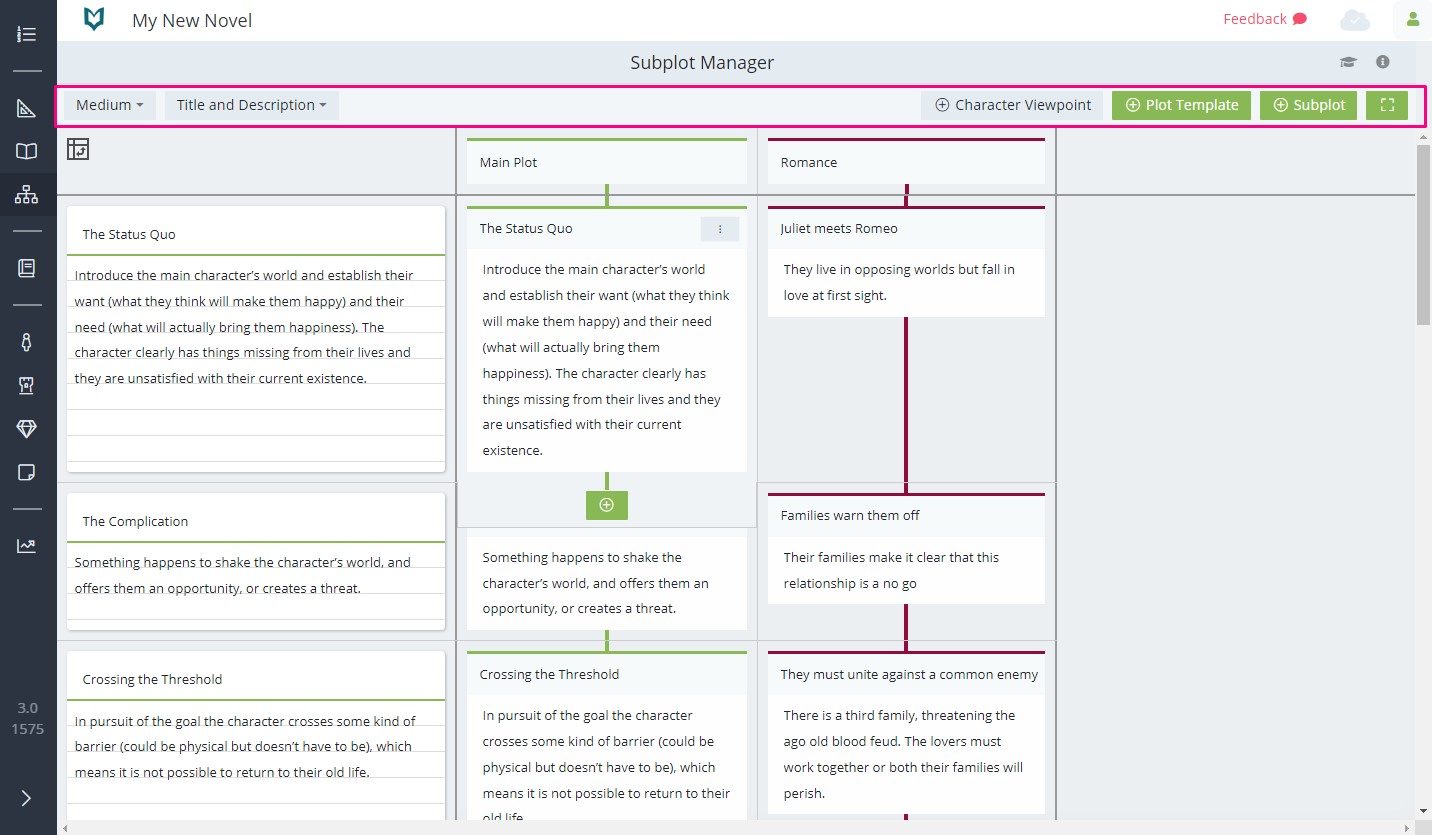
From here you can add a new plot template, a new subplot or a new character viewpoint column. You can also change how the Subplot Manager displays, including changing the size of the cards, how much information they show, and whether you want the subplots to show as rows or columns.
For more information, see the other articles in the Subplot Manager section.